April 25, 2017
It is our high pollen season here so the car was basically green when I got it back from the PDR guy. Upon washing it yesterday, I discovered that I had forgotten to pull out my t-shirt to cover my belt and had lightly rubbed the paint on the front fender with my belt buckle when leaning into the engine bay. Out came my polish.
The mars were easily removed but I was surprised by what my rag looked like. It has the paint color on it. The guy I bought the car from and the guy he dealt with in California did not think the car had been painted.

Back in January I had used a 3M light polish with my orbital buffer on the car and the pad had not turned color, like the rag did, which led me to believe that the entire car had been clear coated. Thus no original paint. Now I was curious so I tried each panel to see what came off on the rag. Turns out the rear doors, rear quarters and the trunk had clear coat. That 3M polish is very mild so that may be the reason it did not turn color.
I had been curious as I did not see evidence of overspray, even on those areas that had been painted. Also, the stone chips on the nose are consistent on both the lower part by the turn signals as well as the hood. The rest of the car was single stage paint.

So I ended up completely hand polishing and then waxing the entire car!! Some time ago I had bought a Griot product for removing wax from plastic and rubber trim. I hadn’t used it before but all the door rub strips had lots of wax on them. It worked reasonably well. Didn’t remove all of the wax but the trim does look better.


April 27, 2017
I installed the dirt shields in the front wheelwells yesterday. The rubber seal and some strip caulking should seal it up well.


I had ordered a set of Coco mats which also came yesterday. They have a very thick backing so I now have tons on insulation in the front footwells.


Some extra curricular work happened today. Yesterday evening I got a text message from my 16 year old grandson. He had a fender bender and wanted me to find a front spoiler/valance and right front fender for his 1987 Porsche 944. My text back was “Are you OK”. He texted back that he probably would not have texted me about the parts if he hadn’t been OK. Which was a good point and I was happy to hear that good news. He was passing a large truck on a two lane road when the truck came over towards him. It was either hit the truck or head for the ditch. He chose the ditch and hit a small sapling on the right front. My son said it was a relatively cheap learning experience.
Craigslist found a guy about 30 miles from here parting out a 944. He sent me a closeup of the dent in the fender which was slight enough for the princely price of $25. What I didn’t catch was that price was with me taking the fender off. He was nice enough to lend me a 10mm socket and wrench along with a 10mm open end wrench, which was all that was needed. Fortunately, I had brought along a moving blanket to place the fender on. This was sorely needed as we had heavy rain the past two days so it was muddy in the junk yard. The photo below is of the parts car when it still had wheels on it. It was on the ground today.
I found the ’87 about three years ago. My son paid $3000 and spent about $2K fixing it up. So they don’t have much money in it. Last summer Garrett spent a couple days at my house for a P&W Seminar. That would be Polish & Wax!! He was thrilled!! Unlike his dad and me, he is not really a car guy. Computers are his thing. Although he will get some hands on experience this weekend as he will be removing the fender and the front spoiler.


In discussing the accident, my son and I came to the conclusion that Garrett did not have enough horsepower. Had his car been quicker, he would have been around the truck before it pulled over into his lane. Matt just happens to have a LS1 motor sitting in his his garage and is itching to install it in the 944. We had installed that motor in Matt’s ’79 El Camino. He replaced it with a 4.8 liter iron block LS motor with his custom designed turbo system. It dynoed at just over 700HP at the crank. That motor is in his very, very stock looking El Camino, which is his daily driver. The paint is very tired and has dents. The only giveaway’s are the 3″ exhaust pipes and the wide black steel wheels with drag tires on the rear.
April 29, 2017
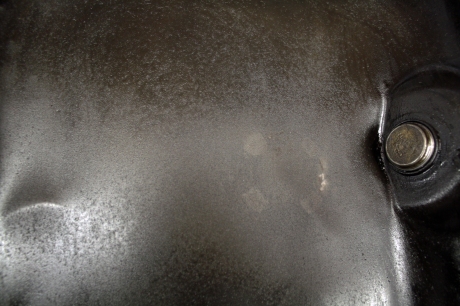
When I removed the old coil to install the new one today, I discovered a blob of paraffin located beneath the coil. I hadn’t noticed this before as it is partially hidden when the coil is in place. It appears the insulation melted on the failed coil. I did notice some residue on the rear of the coil but I thought it might have come from some of the dirt that entered the engine bay when I power washed the bottom of the car.


I drove the car about 30 miles and everything seemed fine. I do have the old coil in the trunk along with the necessary tools to install it. By the way, the old coil was also made in Brazil.
May 19, 2017
After a couple weeks off getting ready for our trip, I had some time to work on the car today. I had previously purchased a injector seal kit but had not gotten around to installing it. I began on the left side by removing the fuel lines on each end of the fuel rail. I loosened the top clamp on the hose from the injector to the fuel rail and then lifted the fuel rain away from the injectors.
There is a 10mm bolt on the retaining clamp. Now the injector can be easily removed. At this point I realized that I could have removed the fuel rail and the injectors as one piece which is what I did on the right side.

Because there was debris around the injector hole, I vacuumed it away. The bottom rubber seal was still in the hole so I hooked it to remove it and then vacuumed again. With the injector on the bench, I could proceed to remove the short hose. Since the bottom of the hose slides over a barbed end, I had to cut the lines away from the injector. With that done, I could remove the c-clip that retains the rubber mount and then the retaining clamp. After a thorough cleaning, I reassembled everything with the new parts and installed new hoses on the fuel rails.


Everything was going great until I discovered that two of the four injectors on the right side were missing the plastic piece that covers the end of the injector. Without those pieces, the bottom seal did not fit tightly as it should. I e-mailed the photos of the injectors to Tom at Mercedes Benz Classic who said I definitely needed those parts and that he had them. Part No: 000-987-53-35. Eight of them are on the way so no driving the car this weekend.


May 20, 2017
Quote:
Originally Posted by Tomguy  Looking good! The missing pintle caps coupled with the previous repair of the injector hoses (the factory style is crimped hoses on the bottom, not clamped) indicates someone previously serviced the injectors – and broke the pintle caps in the process! You may be fixing an issue you didn’t even know you had. Without those pintle caps it’s likely that you had vacuum leaks by those injectors, causing the cylinders by them to run lean and the rest of the engine to run rich. Make sure to report back what difference you have, if any, in running after!
Due to the conditions of those injectors and previous questionable service history I might suggest seeing if you could set up a test flow bench to compare the flow of each injector. You can use a canning jar below them all for example, while connected to the fuel rail and the fuel pump running, and wire them all to turn on at the same tine, and ensure they all deliver the same amount of fuel. Or you can test them individually, and fire each one for a given time (ex: 30 seconds) and make sure all of them deliver the same volume. |
It will be interesting to see if there is any difference. The car starts hard when warm. Once it does start, it runs fine. I wonder if these leaky seals could be affecting that. When I pulled the plugs a few months ago, they all looked the same and were burning clean.
I did have one injector with the crimped line. It was a bear to remove. After cutting off the hose flush with the crimp connector, I had to dig out the remaining hose with my utility knife. Once all the rubber was out, the connector could be removed.
The injectors received a new seal kit on June 27, 1997 at 127,754 miles. I only have records back to 1991 and 96K miles. Is it likely that the injectors would have been replaced by 96K miles? I had considered installing new injectors but the car runs fine so I could not justify spending $1,000 for new Bosch injectors.
May 21, 2017
Quote:
Originally Posted by berfinroy New injectors are rarely needed. “Remanufactured” (cleaned and flow tested/matched) will do just fine. There are many sources, including-usually-our forum sponsor, Pelican Parts, although they seem to be out of stock at the moment. Witchhunter Performance is another good source with current core exchange price of $22 per injector.
|
Thanks for the lead on Witchhunter. I looked them up and will be sending them my injectors. This will be the perfect time as I will be gone on our trip and won’t be driving the car. They include new seals and pintels. Since I have the new seals and the new pintels are on the way, I am going to ask them if they can do the work for less money.
May 22, 2017
Witchhunter Performance has some FAQ’s on their site that were helpful. One suggestion was to check the resistance of the injector coil to make sure they are all within 10% of each other. I checked mine and they were all the same at 2.7ohms.


They recommend that the injectors be installed soon after they do their service to avoid rust forming. If the injectors are going to sit for awhile, the inside and outside should be sprayed with something like WD40, wrap them individually in a paper towel, and then store the injectors in a sealed plastic baggie in a dry place. Since I am going to be gone for two months, I did the WD40 thing and bagged them. I will take them with me on our trip and mail them to Witch Hunter a couple weeks before we are to return home. They have a six day turn around time.
09/29/2017
Categories: Uncategorized . . Author: jerhofer . Comments: Leave a comment


 I removed the old injectors from their packing from Witch Hunter. They clearly marked which injectors were bad and have each of the cleaned and tested ones packaged individually.